 iPhone 14 Pro
iPhone 14 Plus
iPhone 14
iPhone 13 Pro Max
iPhone 13 Pro
iPhone 13
iPhone 13 Mini
iPhone SE 2022
iPhone 12 Pro Max
iPhone 12 Pro
iPhone 12
iPhone 12 Mini
iPhone 11 Pro Max
iPhone 11 Pro
iPhone 11
iPhone XS Max
iPhone XS
iPhone XR
iPhone X
iPhone SE 2020
iPhone 8 Plus
iPhone 8
iPhone 7 Plus
iPhone 7
iPhone 6s Plus
iPhone 6s
iPhone 6 Plus
iPhone 6
iPhone SE
iPhone 5s
iPhone 5c
iPhone 5
iPhone 14 Pro
iPhone 14 Plus
iPhone 14
iPhone 13 Pro Max
iPhone 13 Pro
iPhone 13
iPhone 13 Mini
iPhone SE 2022
iPhone 12 Pro Max
iPhone 12 Pro
iPhone 12
iPhone 12 Mini
iPhone 11 Pro Max
iPhone 11 Pro
iPhone 11
iPhone XS Max
iPhone XS
iPhone XR
iPhone X
iPhone SE 2020
iPhone 8 Plus
iPhone 8
iPhone 7 Plus
iPhone 7
iPhone 6s Plus
iPhone 6s
iPhone 6 Plus
iPhone 6
iPhone SE
iPhone 5s
iPhone 5c
iPhone 5


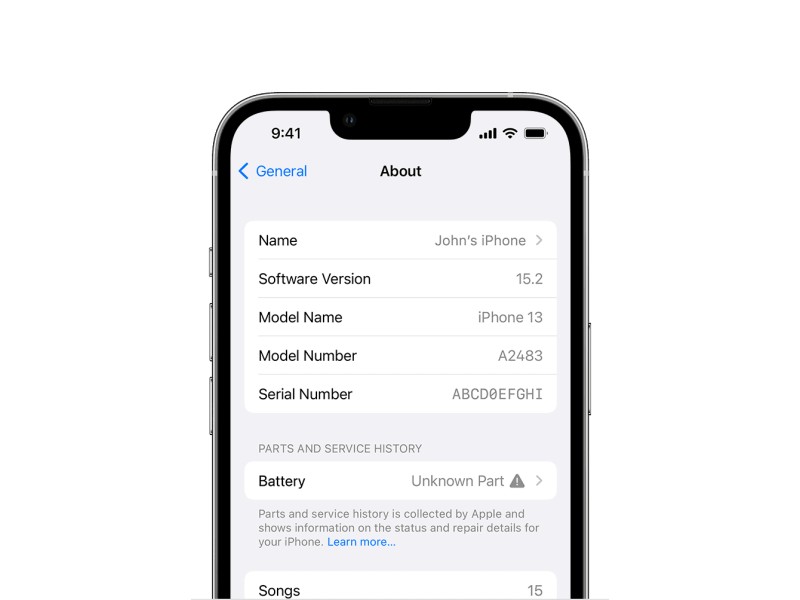
We know that iPhone currently use lithium-ion batteries, and the characteristic of lithium-ion batteries is that they will degrade a little in each charging cycle. Therefore, we can judge the battery health by the maximum capacity and the total number of charging cycles. Apple officially recommends replacing the battery when the iPhone's battery health drops below 80%. Because when the health level is lower than 80%, the system will force the performance management function to be turned on, and the phone may become stuck in some cases; the problem needs to be completely solved by replacing the battery. However, after the iPhone is replaced with an aftermarket battery, the battery health and cycle times cannot be reset, and the iPhone XS and above models will appear non-original battery prompt. Today we will teach you how to solve this problem.
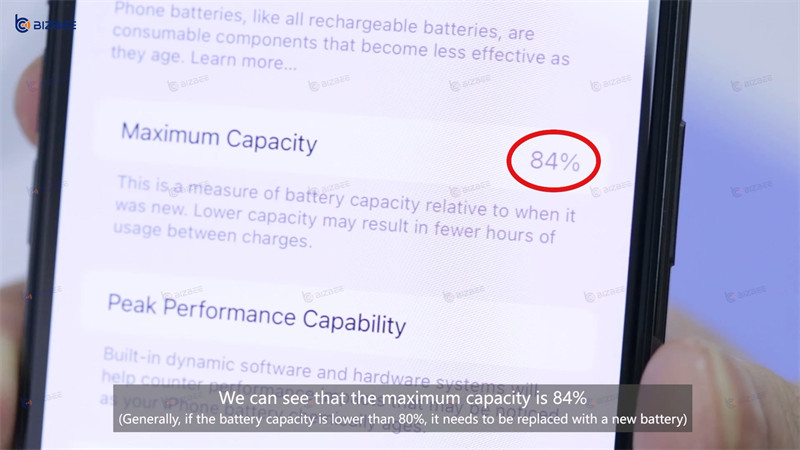
There is an iPhone 11 Pro Max, let's check its battery health. We can see that the maximum capacity is 84%. Now we replace this phone with a new battery, but in order to prevent the it from showing a non-genuine battery prompt, we only replace the battery cell and keep the BMS board of the original battery.
Watch the video:
Step 1: Remove the battery
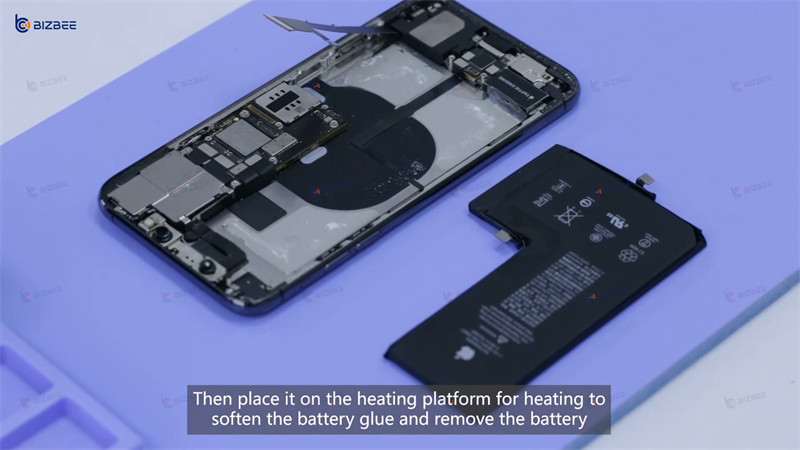
First, turn off the phone. Remove the bottom screw and place the phone on a heating platform to heat and soften the waterproof glue. Then use the KAISI Mobile Phone Screen Remover to remove the screen and the screen plate and battery plate. Next, remove the bottom battery flex cable plate and the charging port flex cable plate. After that, place it on the heating platform for heating to soften the battery glue and remove the battery.
Step 2: Remove the BMS board of the original battery
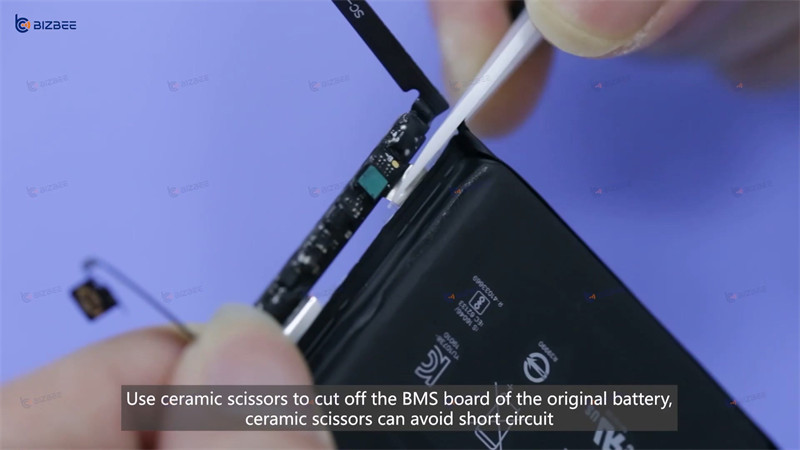
Now we need to remove the BMS board from the original battery. Use ceramic scissors to cut off the BMS board of the original battery, ceramic scissors can avoid short circuit. After removing the BMS board, trim the positive and negative electrodes of the BMS board to make it easy to weld.
Step 3: Weld the new battery cell with the original BMS board
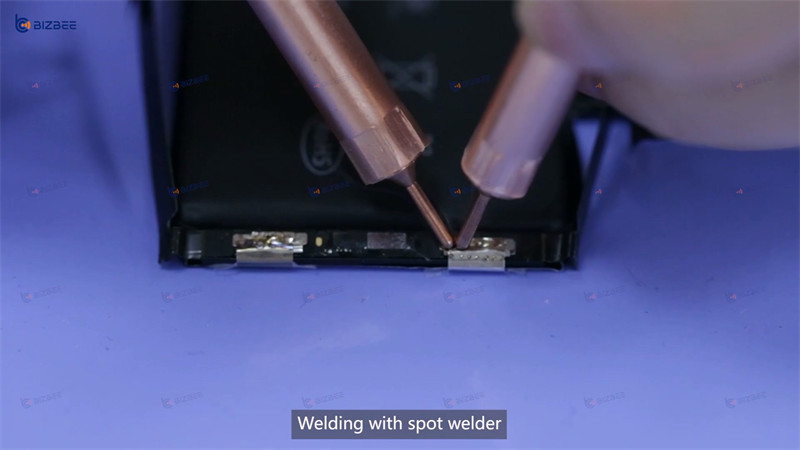
Take out the new battery cell. Align the positive and negative poles of the original BMS board with the battery cell and welding with spot welder. After welding, install the battery bracket and protective tape in turn.
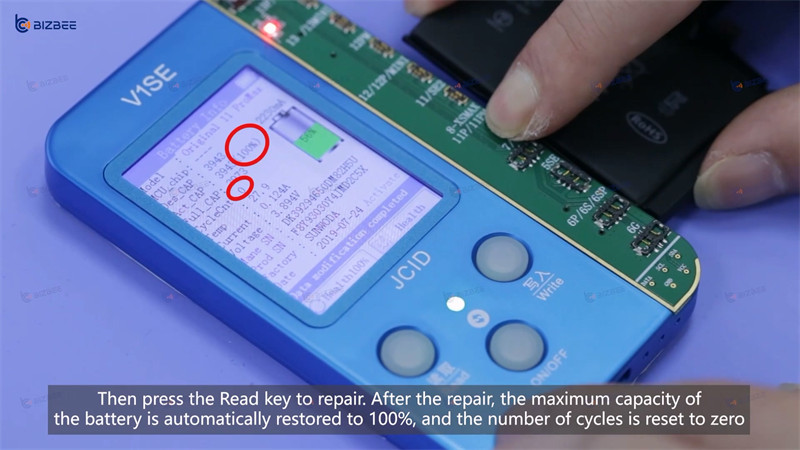
Step 4: Repair the battery data by JC V1SE programmer
Take out the JC battery repair flex cable and install it on the battery. Now press the NO/OFF button to turn on the JC V1SE programmer with the battery repair external board installed. Connect the battery to the JC V1SE programmer and press the NO/OFF key to switch to the one-key repair data 100% mode. Then press the Read key to repair. After the repair, the maximum capacity of the battery is automatically restored to 100%, and the number of cycles is reset to zero.
Step 5: Install the phone and test
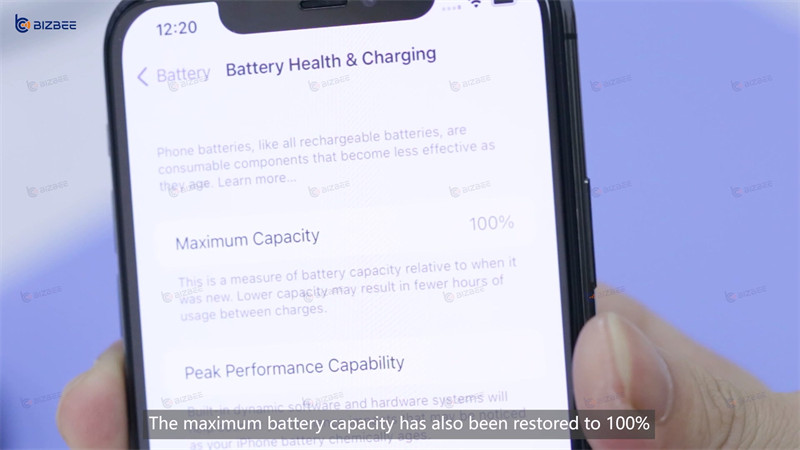
After the battery data is restored successfully, stick the battery adhesive and install the battery back on the phone. Reinstall each plate in turn. Install the screen. Now enter the setting page after turning on the phone, we can see that there is no Unknown Part prompt for battery. The maximum battery capacity has also been restored to 100%.