 iPhone 14 Pro
iPhone 14 Plus
iPhone 14
iPhone 13 Pro Max
iPhone 13 Pro
iPhone 13
iPhone 13 Mini
iPhone SE 2022
iPhone 12 Pro Max
iPhone 12 Pro
iPhone 12
iPhone 12 Mini
iPhone 11 Pro Max
iPhone 11 Pro
iPhone 11
iPhone XS Max
iPhone XS
iPhone XR
iPhone X
iPhone SE 2020
iPhone 8 Plus
iPhone 8
iPhone 7 Plus
iPhone 7
iPhone 6s Plus
iPhone 6s
iPhone 6 Plus
iPhone 6
iPhone SE
iPhone 5s
iPhone 5c
iPhone 5
iPhone 14 Pro
iPhone 14 Plus
iPhone 14
iPhone 13 Pro Max
iPhone 13 Pro
iPhone 13
iPhone 13 Mini
iPhone SE 2022
iPhone 12 Pro Max
iPhone 12 Pro
iPhone 12
iPhone 12 Mini
iPhone 11 Pro Max
iPhone 11 Pro
iPhone 11
iPhone XS Max
iPhone XS
iPhone XR
iPhone X
iPhone SE 2020
iPhone 8 Plus
iPhone 8
iPhone 7 Plus
iPhone 7
iPhone 6s Plus
iPhone 6s
iPhone 6 Plus
iPhone 6
iPhone SE
iPhone 5s
iPhone 5c
iPhone 5

The malfunction of the rear camera is a common issue in mobile phone repair, and often requires replacement with a new rear camera. However, if we replace the rear camera of iPhone 12 and later models after upgrading iOS to version 14.4, there will be an Unknown Part prompt in the settings interface. Today we will show you how to fix the Unknown Part prompt that appears after replacing the iPhone rear camera.
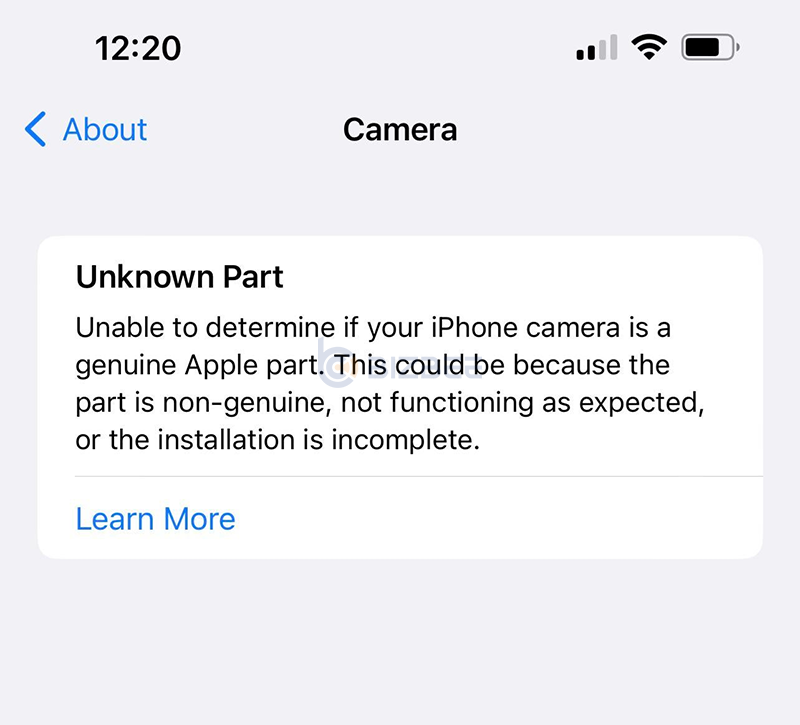
There is an iPhone 12. The problem is that the original rear camera is disabled. Setting page shows Unknown Part after replacing the rear camera. Let's fix it with JC V1S Pro.
Cautions:
1. Please check whether the V1S Pro has sufficient power before operation;
2. Whether the automatic shutdown time is appropriate;
3. Keep the V1S Pro connected to the Internet;
4. Stay connected to the phone.
Tools we need:
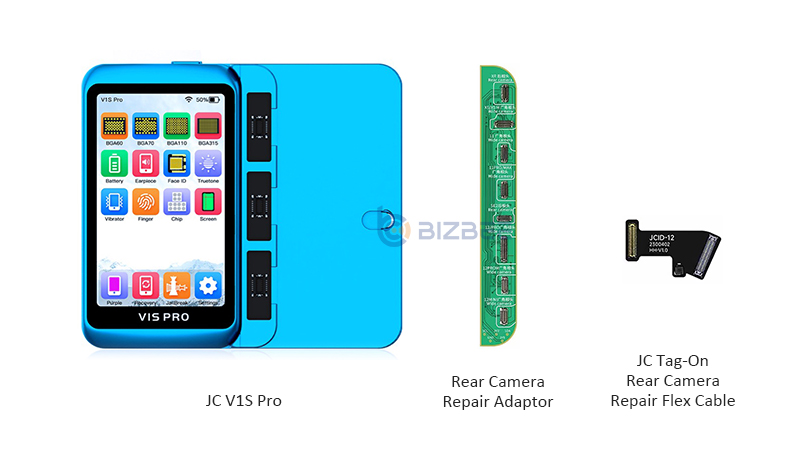
Product link:
1. JC V1S Pro: https://rebrand.ly/bizbee-jc-v1s-pro-programmer
2. Rear Camera Repair Adaptor: https://rebrand.ly/bizbee-rear-camera-repair-adaptor
3. JC Tag-On Rear Camera Repair Flex Cable: https://rebrand.ly/bizbee-jc-tag-on-camera-fpc
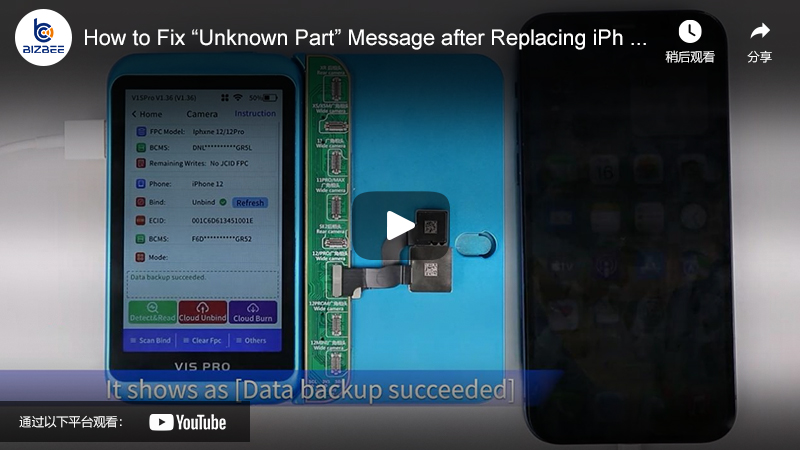
Watch the video:
First buckle the rear camera repair adaptor on the V1S Pro, and connect the phone and JC V1S Pro with a USB cable. Click trust on your phone.
With Original Camera Whose Data Can Be Read
Step 1: Read bind
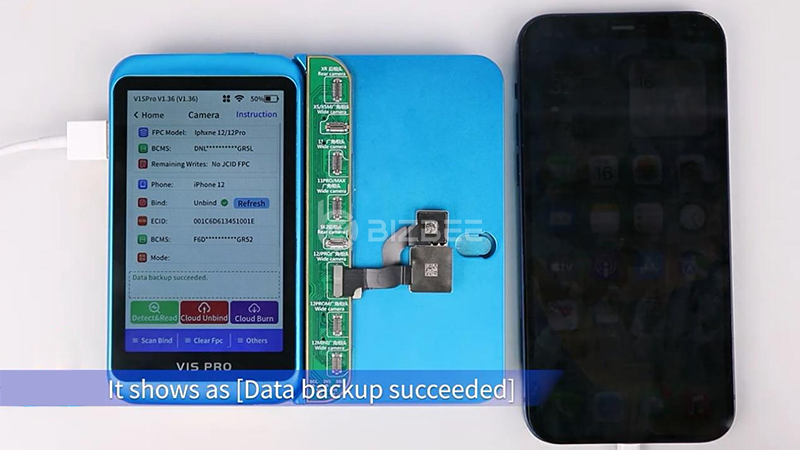
Buckle the removed original camera on V1S Pro on the corresponding port of the adaptor. Click "Detect&Read". When it shows "Camera data read success", click "Cloud Unbind". It shows as "Data backup succeeded". Now remove the original camera.
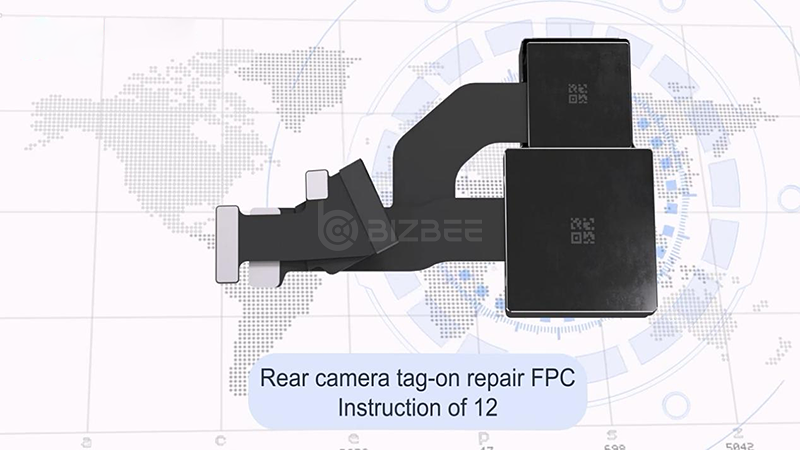
Step 2: Install FPC
Next we can install the rear camera tag-on repair FPC. Just follow the instruction in the video, you will know how to install the FPC.
Step 3: Cloud burn
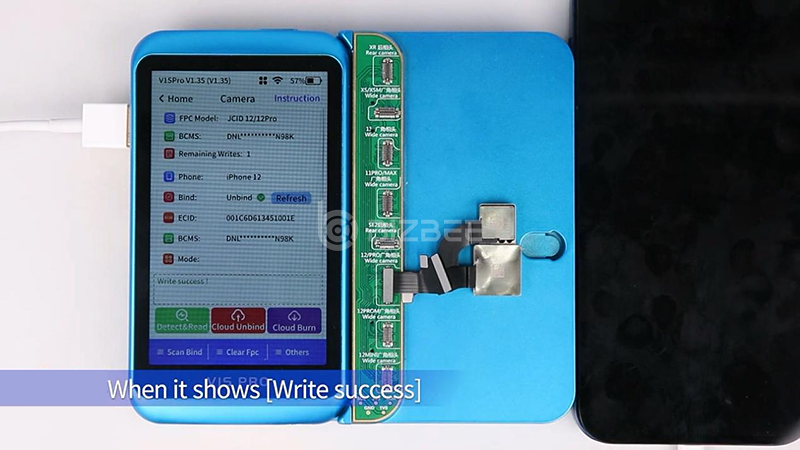
Buckle the camera with JCID tag-on camera FPC on the corresponding port of the adaptor. Click "Detect&Read" to identify the FPC info. Click "Cloud Burn", the cloud data is named after the getting time by default. Then select the data to be written, click "Select", click "OK" to start writing data. When it shows "Write success", remove the camera and install it in mobile phone to check.
With Original Camera Whose Data Can't Be Read
Step 1: Unbind by scanning QR code
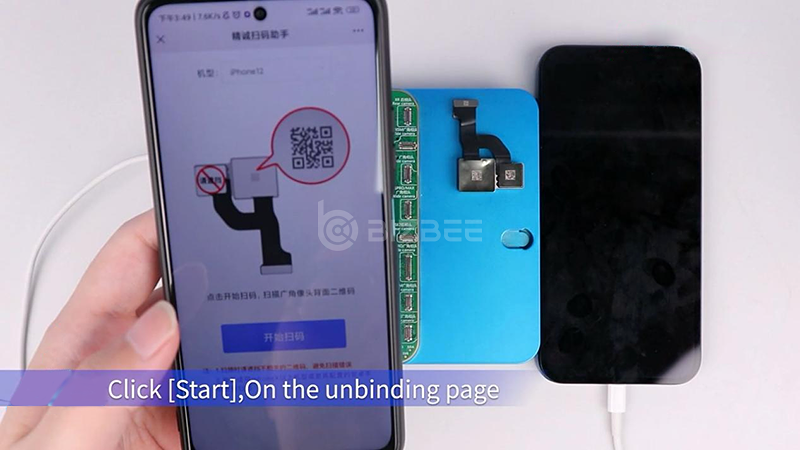
Click "Scan Bind", scan the QR code generated by V1SPro with another mobile phone. Click "Start" on the unbinding page. Scan the QR code on the back of the original camera. When it shows "Unbind successfully, data has been back-upped to cloud", get a new camera and install the FPC to burn data.
Operation for repairing without original camera. First, it needs to be unbound.
1. We can dismantle nand and unbind with P13;
2. Unbind without dismantling with V1S Pro;
3. Dismantle nand and unbind with V1S Pro + nand module;
4. Or unbind by jail-breaking with J-BOX or the jail-break tools of the third party.